We splurged. We couldn’t resist. And with our sous vide set-up…we knew we would not be disappointed with the results. It’s like purchasing a really expensive bottle of wine with a complete guarantee that when you choose to open the bottle…it will be perfectly aged…no matter how many cross-country U-Haul moves, heat waves, cold spells, jostling and climate changes it survives. Guaranteed. That is what our sous vide has done for our cooking. Given us the confidence to purchase wonderful, (expensive), amazing ingredients knowing that we won’t can’t screw it up.
Who are we to say “no” to the nice woman at the Fish Truck at the Saturday farmer’s market, when she tells us she has a beautiful WILD WHITE KING SALMON! I haven’t seen one of these since I lived in Wrangell, AK. Now…I know what you’re thinking…”uhhhhh…that salmon looks pretty pink to me…not a lot of white going on there.” Here is where you’re wrong…it may not be completely white like halibut, but it is much paler than true wild salmon, and there are always variations. White king salmon, sometimes called an ivory king is a rarity…something like 1 in every 100 king salmon are white fleshed. Way back in ole ancient times…I mean…probably more like a couple of decades ago…white kings were cast aside or sold for much cheaper than the typical dark and richly colored king salmon and namesake of many a paint color. Now they are highly desirable and the price reflects the demand and rarity.

I had always believed and been told that the paler flesh of the white salmon was due to a difference in diet – but apparently, many scientists disagree and think it must be a genetic difference. The theory on the diet is that white salmon fed on squid and fish as oppose to krill. Salmon generally feed on shrimp and crabs which contain high levels of carotenoids, or natural pigments found in plants and animals, and include beta-carotene, therefore giving them a darker coloring. Whatever the reason…I think the fish is delectable.

Our menu included Israeli couscous, very skinny asparagus, and a Meyer lemon butter emulsion…oh, and of course the wild white king salmon prepared sous vide. First step was to brine the fish for a short while. we covered each salmon filet in kosher salt for 5-10 minutes. During the cooking process, albumin can leach out of the fish. This is a white stuff that can accumulate during poaching or baking. Cooking sous vide, in a sealed environment, the albumin can become a little unsightly as there is no where for it to go. However, be careful with how long you brine as it does weaken the cell walls and can turn a nice firm piece of fish very mushy if left for too long, or brined in a solution with very high salinity.

Woody’s new favorite = Israeli couscous. After a quick search, its namesake is more from shape than from ingredients and it is more similar to orzo pasta than the typical semolina couscous used frequently in north African recipes and regional dishes. I love it as a versatile side dish.

Although it is the complete off-season for citrus, we are still pulling the last of our Meyer lemons off of our tree in the front yard. In preparation for the butter emulsion sauce…zest a lemon. You’ll use the lemon zest in the sous vide packets with the salmon as well.

I’m a believer in staying organized while you cook…which doesn’t always include staying ahead of the dirty dishes piling up in the sink. But some would say it is more important to stay ahead of the dishes on your stove and in your oven. Dishes in the sink can wait – sorry Woody. He is my whirlwind sous-chef-cleaning-machine. Sometimes, I will slice up half an onion, turn around to add it to the pan, turn back around, and the other half has already been wrapped up and placed in the fridge. So…he gets appropriately annoyed when I’ve been cooking up a storm…and it looks like a tornado came through the kitchen and pulled out 80% of our dishes, utensils and tools, smeared them with batter, sauce, crumbs and grease and strewn them around the kitchen haphazardly. (thanks for being there to clean up after me husband)

Prep your onion for the couscous, a fine dice will do nicely.
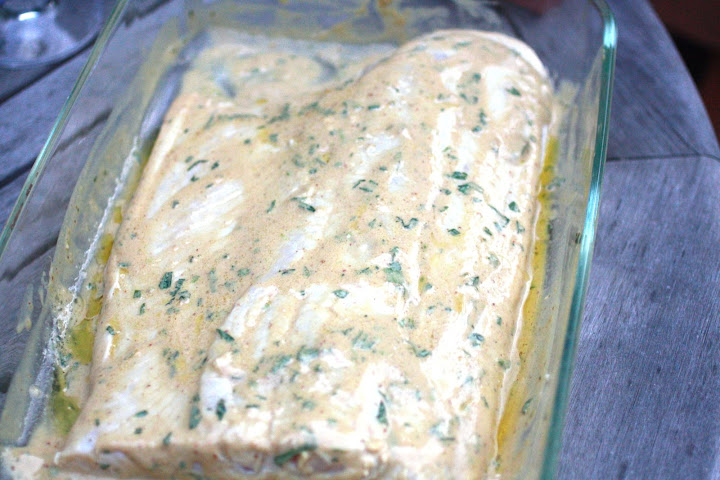
Once you have brined the salmon, rinse off all the salt and then pat them dry. Slide them into the plastic bag for the vacuum-sealing, sprinkle in some lemon zest and add a pat of cold butter.

We use the dry vacuum and seal button on our vacuum-sealer. We’ve only had a few minor disasters when trying to seal foods to sous vide. One may have included spilling marinating liquid from a cow tongue all over our dog Cleo – who was confounded as to why the intoxicating smell of meat juice followed her wherever she went for at least the next 12 hours – despite our best effort to clean her up. Note to self: don’t vacuum seal when there is a whole bunch of liquid that could get sucked out…and therefore flood your kitchen counter…or alternatively…be ready with a large roll of paper towels.

Begin sweating your onions…no color on these guys, add a little salt as well.

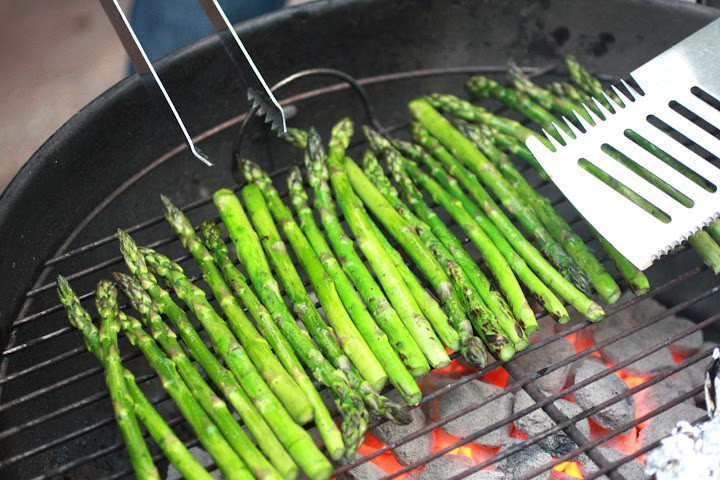
The asparagus were SOOOO skinny I almost felt as if we could cook them enough by waving them over the top of a steamy pan…but instead we tossed them in a pan of shallow salted water for 2 minutes…maybe 3 at the most.

And then immediately into an ice bath to shock them and stop the cooking process. Set them aside.

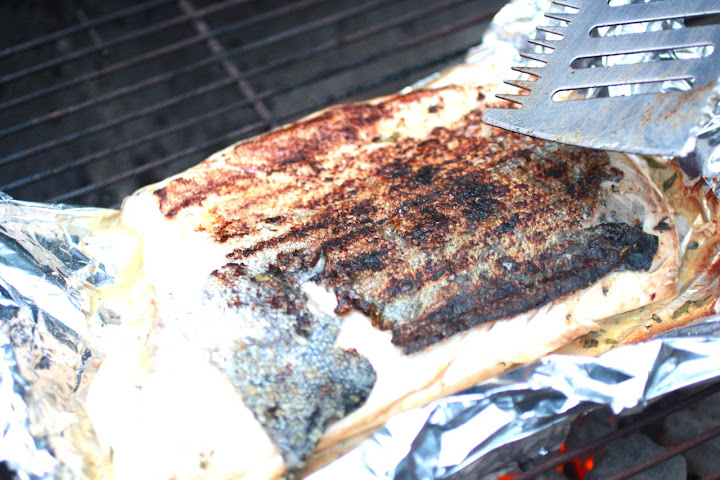
Since the bags used to sous vide can sometimes leave a “seam” where the sides come together around the edge of the protein being cooked, I decided to top the fish with a panko breadcrumb crust. How can pouring butter over crunchy dried breadcrumbs with herbs (dill) and salt and pepper be a bad thing? I dare you to try to answer that one. I double-dare you even.

Melt butter…

Add panko, chopped dill, sprinkle with salt and pepper…

And stir…

Back to the couscous, once the onions have sweat, pour in the couscous and stir to coat…even letting them brown up just a *bit*. This helps develop the flavor and the starch.

Then pour in 2 cups of boiling water, cover, turn the heat down to low and simmer…I think it took between 10-15 minutes…but check the box for specific instructions.

Here’s the set-up. Thermal immersion circulator in upper left, and the bin is from a restaurant supply store. The circulator gets clamped on the side and we fill the water bath with distilled water to avoid any buildup of minerals on the equipment.

We had the temperature set at 60º C which is 140º F, and we put the fish in for approximately 20 minutes.

The thermal immersion circulator is very precise, we check it with an instant read thermometer and make any adjustments using the dial on the upper left (-1 to +1) for calibration. It is constantly flicking it’s heating element on and off to regulate the temperature of the water without the temperature fluctuating more than a degree.

The timer beeps, and the couscous is ready, a quick stir, a touch of salt, and it is ready to be plated…almost.

I envisioned asparagus spears on the plate…Woody envisioned mini-asparagus rounds tossed in with the couscous…we compromised. I trimmed the bottom third off of the asparagus spears and made lovely mini-cuts.

And saved the tips of the spears for the plate.

Oh…how could I almost forget the butter emulsion sauce. My dad has been overheard saying, “This sauce alone, was worth the price of cooking school.” Super simple…and I almost hesitate to share and let the secret out…ummm…I’m having second thoughts. Okay…I can’t give it up yet. But I can list ingredients, right…? That won’t betray the secret of the sauce…right? Ingredients: water, cold butter, lemon zest, a little lemon juice, salt and pepper, herbs (if wanted)…hint: it’s an emulsion.

It is amazing…I’ll do some deep personal growth and see if I have the capability of sharing the method in a future post. What? I’ve got to hold onto a little mystery.

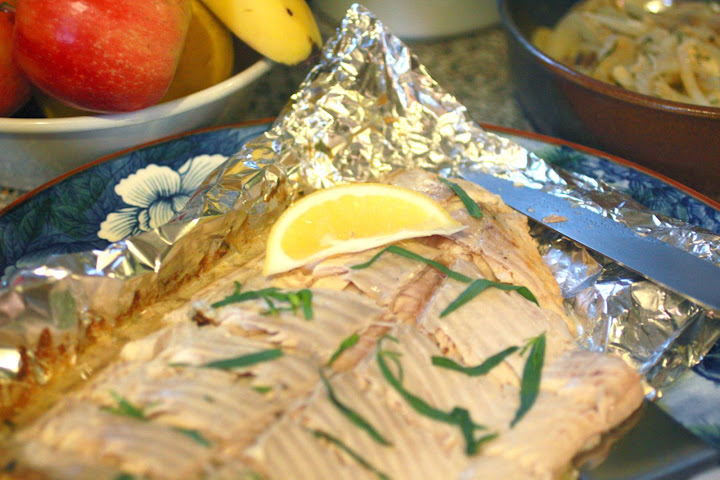
Once the fish is done, remove the bags from the water bath and cut the tops off. Carefully remove them from the bag and place them on a rack, straight onto the plate, into a hot pan to sear the sides, or a cutting board if you’ll be slicing it. Remember, we are adding a delicious crust of panko and dill, so we placed the filets on a sheet pan with a drying rack on it.

Admire the delicious beauty…

Gently smush the topping onto the fish.

Now pull out your blowtorch. Yep…blowtorch…is there a problem? You should get one of these for your kitchen…especially if you sous vide. And go to the hardware store…not a fancy-shmancy cooking and entertaining store – which are great…but those mini culinary torches…are well, mini…and you could be another couple of years older by the time you’ve completed the job.

Dish below has been torched, plated, sauce ladled, and asparagus posed.


We tried one other method of browning the crust, using the broiler. It worked better than the torch for this particular job…it brought out the butter and nicely toasted the crumbs with less singeing.

Texturally, it was amazing…and unfortunately I have no photos after we began eating…it disappeared quickly. The light dill flavor with the skinny asparagus and couscous…I would like it again for dinner tonight, please!

We finished the meal with some fresh raspberries that needed nothing else.

Cleo enjoyed the meal in her own way as well – salmon skin. It went down in one gulp.

With lots of summer evening light left, we played a few rounds of cribbage and finished off the wine.

I’m pretty sure I won, but Woody won the last game we played…so he can’t feel too bad.